|
Configuring The HL7 Listener Service |
Previous Top Next |
The Listener Configuration application (listenerconfig.exe) program was installed when you ran EasyHL7ListenerSetup.msi (see Installation Instructions). To open the program, from the windows 'Start' menu select 'Programs' then under the 'Hermetech HL7' group click 'HL7 Listener Configuration'.
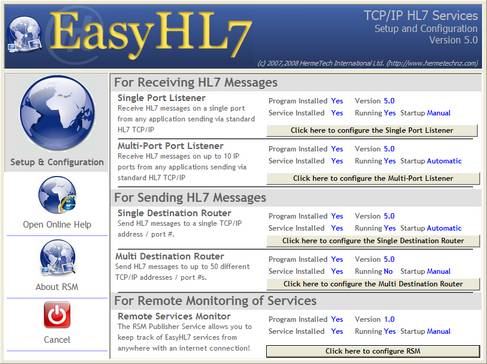
The installation process installs ALL of the HermeTech TCP/IP services onto your computer. They are NOT registered automatically as System Services however. This is done in each products' configuration window. When you start the configuration program, you will see the menu shown below. Select which service you wish to configure (the Single Port Listener in this case) and click 'Ok'.
example screenshot
*IMPORTANT* For first-time Listener installation. After you have completely filled out this window and saved your configuration (see below) you MUST click 'File' then 'Install Listener' to register the application in your systems services.
TCP/IP Settings
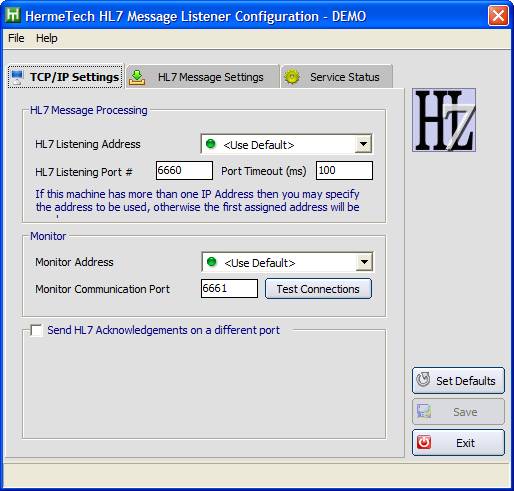
The first time you run the configuration all of the fields will be set with their recommended default values with the exception of the 'Folder'. The properties you can configure are:
| • | HL7 Listening Address - The EasyHL7 listener service is always configured to run on the local computer. However, some computers, especially server computers may have more than one TCP/IP address (from multiple network cards, or VPN connections). If this is the case on your computer you can select the specific TCP/IP address to use as the 'Local' IP address when establishing the listener service on the HL7 Listening port. |
| • | HL7 Listening Port# - A valid, currently unused port on your computer for the service to use to receive ('listen' for) HL7 messages. The default is 6660, but can be any unused port on the computer. Usually this port is mutually negotiated and agreed upon between you and your trading partner (the application sending you HL7 messages). |
| • | Timeout (ms) - The internal port timeout (in milliseconds) to use for TCP/IP communications. The default value is usually sufficient, but may need to be increased if the network connection between your computer and the application sending HL7 messages is questionable. |
| • | Monitor Listening Address - Follows the same rules as the HL7 Listening Address described above. |
| • | Monitor Communications Port - A valid, currently unused port on your computer for the service to use to communicate with the HL7 Service Monitor application. The default is 6661, but like the HL7 Listening Port, it can be any valid port on the computer not being used by another application. It CANNOT be the same as the HL7 listening port. |
| • | Send HL7 Acknowledgements on a different port - In some instances, the application sending HL7 messages to the listener service might require that you send HL7 acknowledgements back to them on a different port number. This is not usually the case, but checking this box allows you to configure alternate communications settings for the listener to use when sending HL7 acknowledgements. This setting is only valid if the 'Send Acknowledgement' value is set to 'AUTO' or 'ALWAYS' (see HL7 Message Settings below). If this setting is used, the sending application MUST have established an active listener of it's own at the address and port information you supply. The listener service will refuse connections from sending applications until the sender's listener is up and running. |
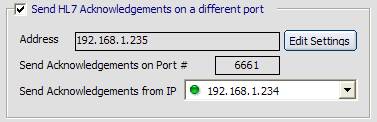
| • | When configuring the EasyHL7 Listener service to send HL7 Acknowledgements on a different port. You have to configure the destination address to send them to as well as the port #. Note that the address/port cannot conflict with any of the main listener monitor settings. |
HL7 Message Settings
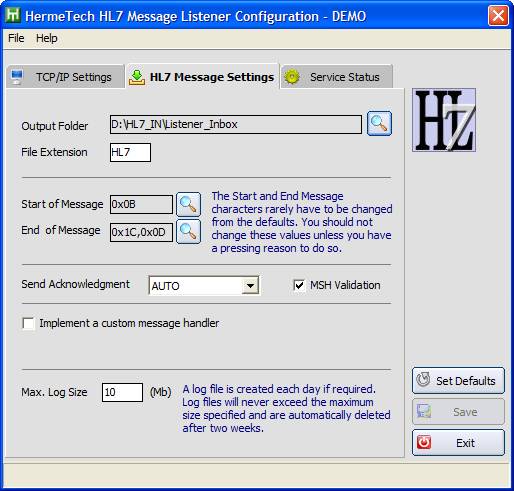
| • | Output Folder - A folder somewhere on the computer that the service will use to store the HL7 messages onto the file system. This is the only property that does not have a default value. When the Listener receives an HL7 message it will write that message into a file on the file system. The naming convention for the file will be <datetimestamp><sequence>.<fileextension>. Click the 'browse' button next to the folder to select the folder. |
| • | File Extension - The file extension you wish the service to use when writing HL7 message files to disk. |
| • | Start of Message - Ascii character(s) that the sending application(s) will use at the beginning of each HL7 message that is sent. This value is automatically set to the HL7 standard default value which is Hex(0B) Ascii(11). |
| • | End of Message - Ascii character(s) that the sending application(s) will use at the end of each HL7 message that is sent. This value is automatically set to the HL7 standard default values which are Hex(1C) Ascii(28) and Hex(0D) Ascii(13). These values are required but can be modified if your trading partner uses non-standard transmission characters. |
| • | Send Acknowledgement - This setting has 3 values (AUTO,ALWAYS, and NEVER) which determine whether the listener will send a standard HL7 acknowledgement back to the sending application. The 'AUTO' setting (default) will cause the listener service to read the MSH segment of inbound HL7 messages for field 15 'Accept Acknowledgement Type' (0 based counting where the segment ID 'MSH' is field 0) and will act on the contents of that field and will send an acknowledgement if that field is not 'NE' (never). The 'ALWAYS' setting will override the contents of the MSH segment and always send an acknowledgement and 'NEVER' will also override the MSH segment and will never send acknowledgements to the sending application. |
| • | MSH Validation - Checking this box will cause the listener to verify the integrity of the MSH segment content and reject for required fields missing. |
| • | Implement a custom message handler - *ADVANCED FEATURE* Checking this box enables you to define a custom message handling ActiveX/Com object. See the section on Custom Message Handlers for further information about how to implement this. |
| • | Max Log Size (mb) - As the listener processes it creates .log files every day in it's own application folder. It is possible, using the system monitor application, to tell the listener service to run in 'Debug' mode. See the section on Using the System Monitor for further details on this feature. This setting lets you determine the maximum size that file can reach before the service will no longer write into it. |
After you have completed making changes click the 'Save' button. The 'Save' button automatically becomes enabled when you change any of the values on the screen. An invalid value in any field will cause it to change color, which will also disable the 'Save' button.
example invalid value entered
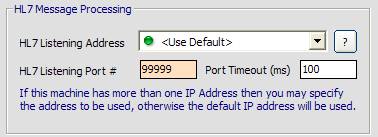
valid port ranges are 1-65535
If you have not yet purchased a license for the computer the listener is installed on, you will need to see the section on Activating Your System for information on how to activate your listener.
To see the listener service in action see the section on the HL7 Service Monitor.
See the section on the HL7 Simulator for information on how to test your listener.