Folder Data Sources
 If an external process is placing HL7 message files into a folder and for some reason they cannot (or you don't want it to) deposit those files directly into the Central Distribution Folder you can create a "Folder" data source.
With a folder data source the HL7 Postmaster will physically MOVE files which match the file extension you select from the data source folder into the Central Distribution Folder. If you have enabled any HL7 Destinations the Postmaster will then evaluate those HL7 data files, extract the HL7 messages and deliver them to all appropriate destinations.
Example of a common scenario. The client computer is receiving HL7 messages from a Lab which are being delivered via secure FTP into a folder. Since you don't want to "share" your Central Distribution Folder with FTP this folder is located elsewhere on the computer running the HL7 Postmaster. You would create a Folder Data Source which would monitor the FTP folder for new HL7 data files and (when detected) these files would be moved into the Central Distribution Folder (note that the files are physically moved and thus will be removed from the FTP folder).
To Create a New Folder Data Source
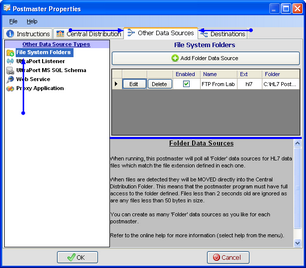
First. Edit the selected postmaster (see Creating and Editing Postmasters) and select the Other Data Sources tab. In the Other Data Sources tab select File System Folders in the Other Data Source Types list.
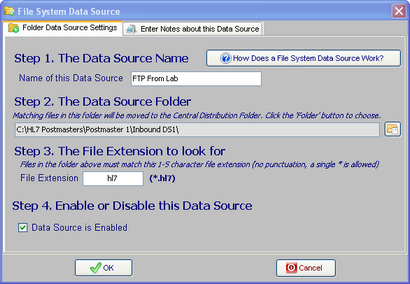
Second. If creating a new folder data source click the  Add Folder Data Source button, otherwise click the 'Edit' button next to an existing folder data source in the list to open up the Folder Data Source properties window. Then in the window fill out steps 1 through 4 and click
  to save your data source.
Step 1. The Data Source Name. All Postmaster objects (data sources and destinations) must have a unique name. It's completely user defined and alpha-numeric and follows the same rules as creating a file or folder name in MS Windows.
Step 2. The Data Source Folder. Click the  button to browse for the folder which this data source should monitor.
Step 3. The File Extension to look for. Enter a 1-4 character file extension which the postmaster should look for in the data source folder.
Step 4. Enable or Disable this Data Source. Check the box to enable the data source, uncheck it to disable the data source.
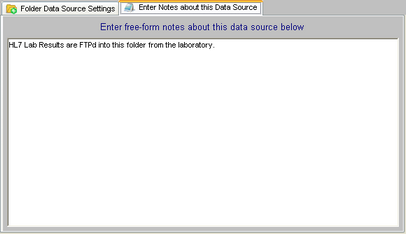
Extended Feature (Optional): You can also enter your own "Notes" about Postmaster Objects (data sources and destinations) using the 'Notes' tab.


