Proxy Application Data Sources
 The UltraPort HL7 Postmaster can integrate with any software applications built using Microsoft Visual Studio and the .Net Framework!
With a 'Proxy' data source you select a TCP/IP port which this postmaster will "Listen" on for HL7 messages sent to it by an application created using the UltraPort Postmaster API toolkit. For this to work you must either have the application installed and running on this computer or on a computer connected to this computer (within the same LAN, WAN or VPN)
In addition to creating your Proxy application data source in the Postmaster you must also insure that the Proxy application itself is configured to send HL7 messages to the Postmaster at this computer's TCP/IP address (if the Proxy Application is on a remote computer) and the Interface Port Number you enter in the Postmaster Proxy application profile.
For information about how to configure a Proxy application to send HL7 messages to the UltraPort HL7 Postmaster you will have to refer to the documentation for that application.
To Create a Proxy Application Data Source
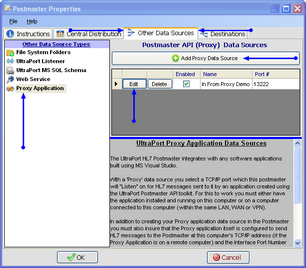
First. Edit the selected postmaster (see Creating and Editing Postmasters) and select the Other Data Sources tab. In the Other Data Sources tab select Proxy Appliction in the Other Data Source Types list.
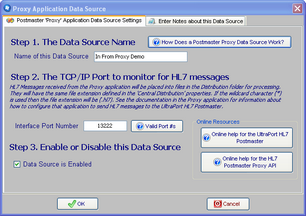
Second. If creating a new data source click the  Add Proxy Data Source button, otherwise click the 'Edit' button next to an existing folder data source in the list to open up the Folder Data Source properties window. Then in the window fill out steps 1 through 3 and click
  to save your data source.
Step 1. The Data Source Name. All Postmaster objects (data sources and destinations) must have a unique name. It's completely user defined and alpha-numeric and follows the same rules as creating a file or folder name in MS Windows.
Step 2. The TCP/IP Port to monitor for HL7 messages. Enter a valid Port Number. Remember that you will need to supply this port number to the Proxy Application.
Step 3. Enable or Disable this Data Source. Check the box to enable the data source, uncheck it to disable the data source.
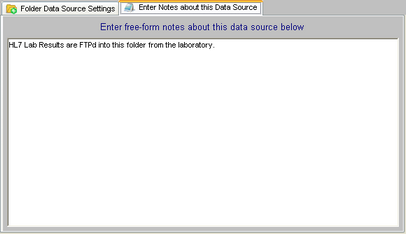
Extended Feature (Optional): You can also enter your own "Notes" about Postmaster Objects (data sources and destinations) using the 'Notes' tab.
For more information about the free UltraPort HL7 Postmaster Proxy API see Proxy Application Development.


