Manual Updates
You will have to manually update an installation at least once every year after you renew your HL7+ subscription, and also if you make any changes to the installation (like upgrades, or renaming it etc). A manual update, like manual activation requires 3 steps.
1.In the HL7+ Client Console you will create a Manual Activation Request file and deliver it to a computer running the HL7+ Management Console
2.In the Management Console you will use that file in the Installation Options window to create a Manual Update Key file and deliver that file back to the client.
3.In the Client Console you will use the Update Key File to apply the updates to the installation.
STEP 1. Creating the Manual Update Request

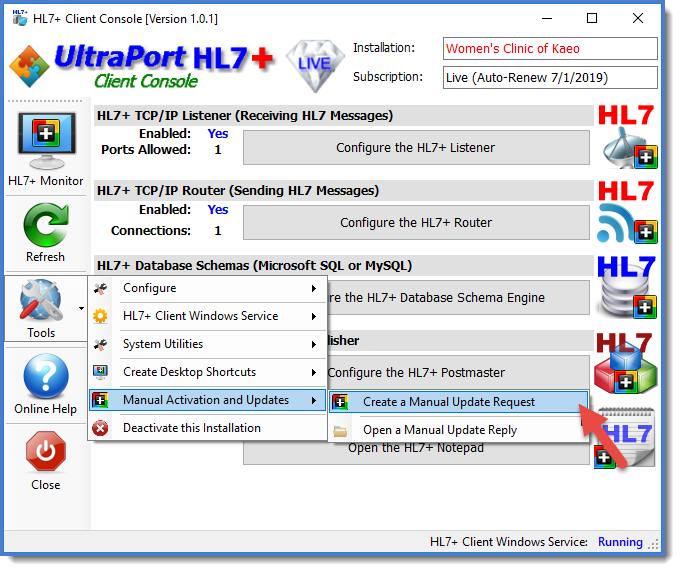
Creating a Manual Update Request
In the Client Console software click the Tools button and in the Manual Activation and Updates menu click Create a Manual Updte Request. You will be prompted to select the folder and it will create a file called <installation name>.UpdateRequest.txt. Deliver this file to a computer running the Management Console software.
STEP 2. Creating the Manual Update Key File
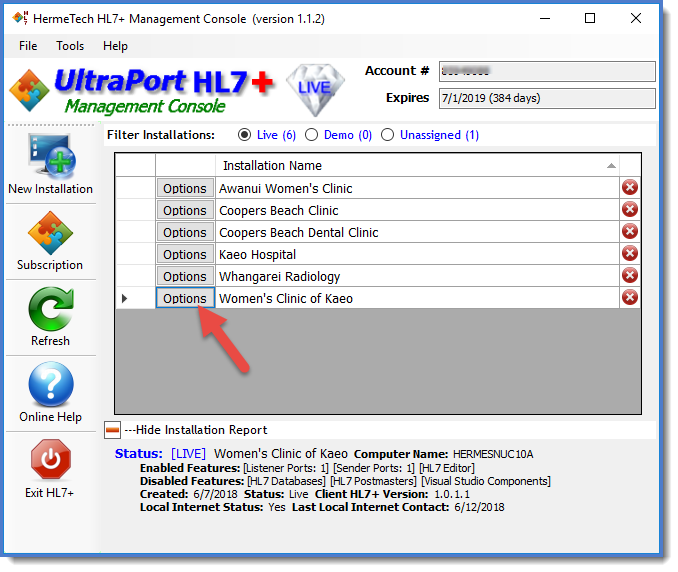
 Click Options to open Installation Options Window |
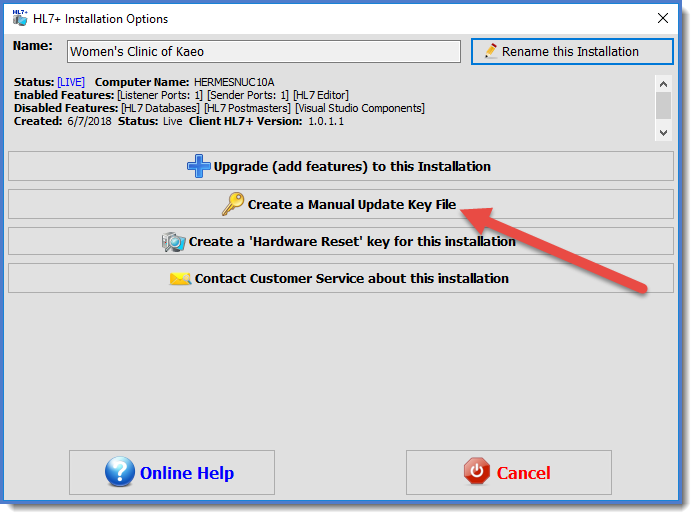
 Click Create a Manual Update Key File |
In the Management Console (installations view) click the Options button for the installation. You will be prompted to open the update request file created in Step 1. It will create the update key file which you must now deliver back to the client computer for Step 3.
STEP 3. Applying the Updates

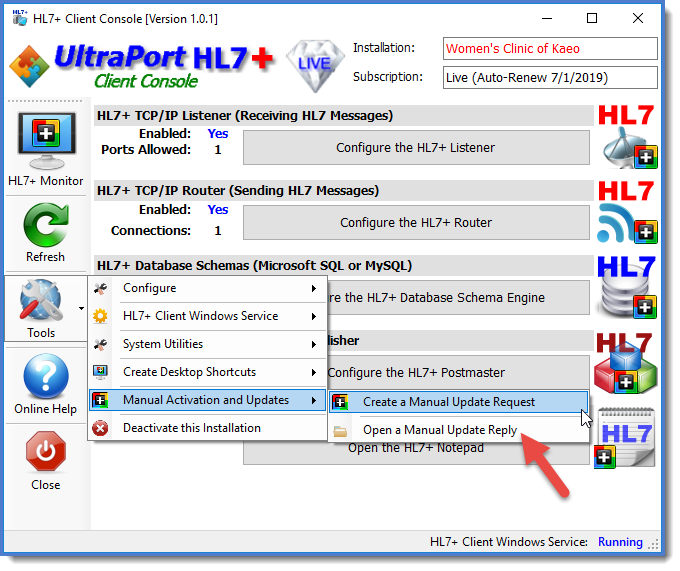
Click Open a Manual Update Reply
In the HL7+ Client Console click Open a Manual Update Reply, follow the prompts and the updates will be applied to your installation.
