Upgrading From Prior Versions
This section deals only with upgrading the software version which is already installed on a computer, like upgrading from version 4.0 to version 6.6.0. It does not cover upgrading your software license, like upgrading from a "Developer" license to a "Professional" or "Enterprise" license or upgrading a "Standard" license to a "Virtual Machine (VM)" license.
IF you are currently running any version of this product earlier than version 3.0 then you need to contact HermeTech Customer Service for assistance.
|
Do I need to uninstall the software before I run the latest install? |
|
Typically NO. When you run the installer for the new version it will tell you if you need to uninstall the prior version first. What is important is that you make sure NONE of the Schema Engine programs are running before you start the installation. This includes the Configuration Program, any of the MS Windows Services and the Schema Browser. |
 IMPORTANT: Before you begin any upgrade process it is always a good idea to back up your Critical Files and Folders. Also, if you are upgrading from ANY 32-Bit version (any version prior to version 5.0) to a 64-Bit installation you should make sure that you review the section on Upgrading to 64-Bit Installations.
Step 1: Download the installation package (.MSI file) of the latest version of the software from the HermeTech Website. Once downloaded run the MSI file either right from your web-browser downloads or by double-clicking the file in MS Windows Explorer. The installer will tell you if you need to manually "uninstall" the prior version first.
Step 2: During the installation process make sure that you install the new version right over the existing installation. The "Default" installation folders have not changed so if you followed the default prompts in your first installation you can just follow the prompts in your new installation. If you're not sure then you should verify WHERE the software is currently installed BEFORE you proceed with installation of the new version.
Step 3: AFTER the installation is complete you should be able to start the program and still see all of your Schema Profiles, Inbound Processors, etc still intact and ready to run. If you do not then you might need to copy your Critical Files and Folders (which you backed up earlier) into the new installation folder.
 Step 4: CRITICAL. After you have installed the new version you MUST verify at least ONE of your active Database Schemas to determine if the new version needs to alter the database Schema Tables. IF you see that one of your Schemas needs repair then you MUST validate and repair ALL of them.
Validating and Repairing Database Schemas
These steps are VERY IMPORTANT and should always be done any time that you upgrade your software. Determining if your HL7 Schema needs to be created or repaired is really very simple. From the Main Window simply Edit the Schema you wish to verify by clicking the "Edit" button in your list of HL7 Schemas. This brings up the Edit Schema Window.
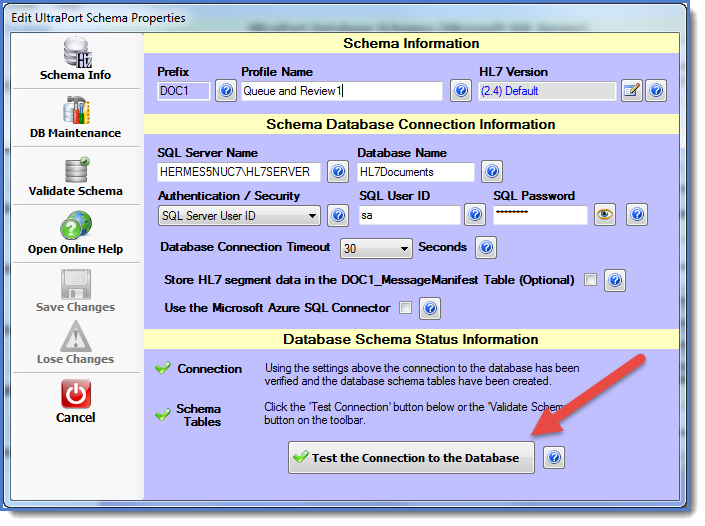
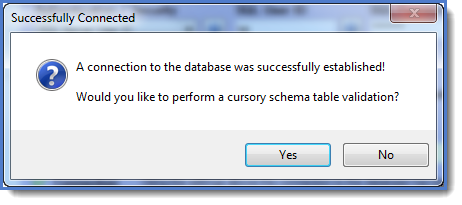
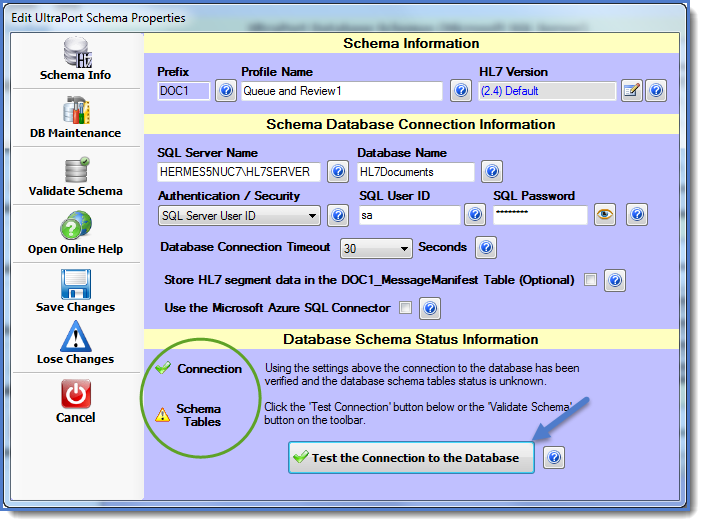
In the Edit Schema window click the "Test the Connection to the Database" button. The program will attempt to connect to the database and on successfully connecting you will then be presented with a message box asking if you would like to "perform a cursory schema table validation?".
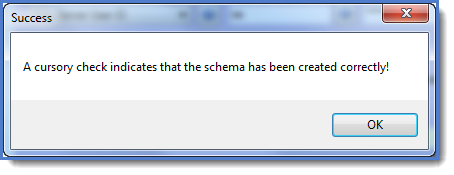
Click YES here. If the software upgrade did not require any database changes then you will see this:
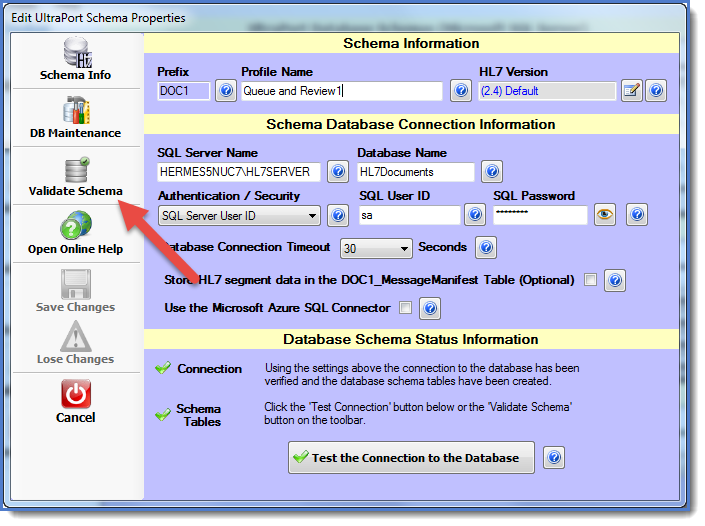
ANY other response than the Schema Verified message box above indicates that there may be a problem and you need to Validate the Tables and repair them. Do so by clicking the "Validate Schema" button to open the Database Utilities Window.
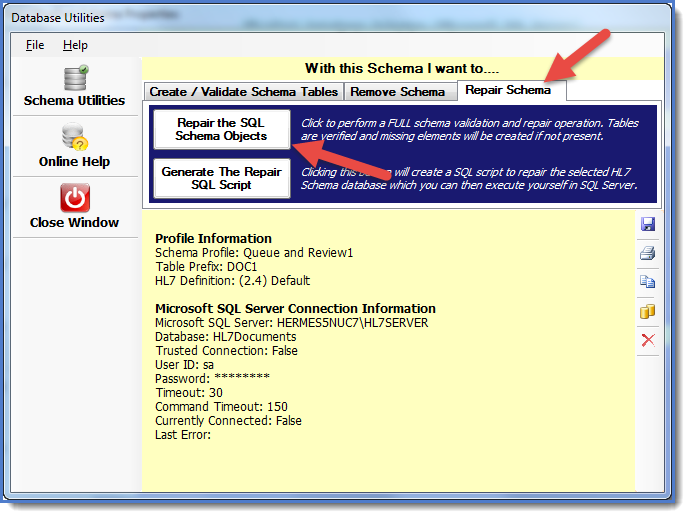
In the Database Utilities Window go to the "Repair Schema" Tab.
In the "Repair Schema" Tab click on the "Repair the SQL Schema Objects" button. The program will execute SQL scripts to make any changes necessary to bring the database up to the latest version.
FINAL STEPS. Once the repairs have been completed exit the Database Utilities window by clicking "Close Window" which will return you to the "Edit Schema" window.
Click the "Test the Connection to the Database" button again, and again, when prompted indicate that you would like to "perform a cursory schema table validation?". This time you should receive the "Schema Verified Message".
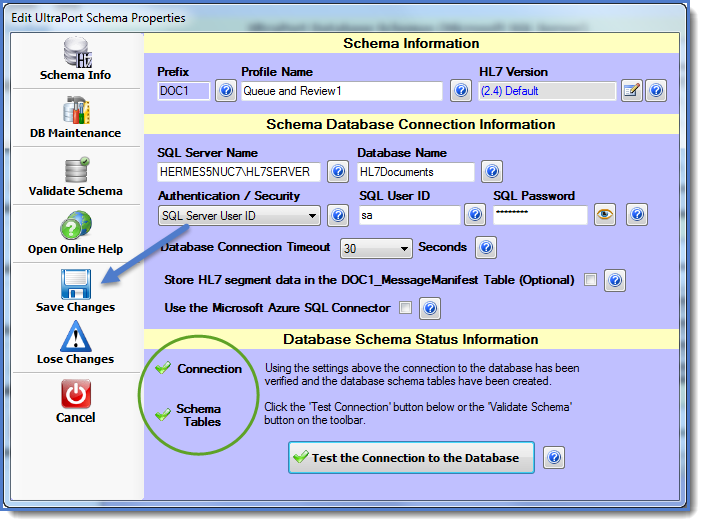
Click OK and you should then see the Connection and Schema Tables areas flagged with 2 green check marks.
You then click "Save Changes" to update your Schema Profile and you are DONE with this Schema.


