|
Editing HL7 Segment Elements |
|
Add / Remove Fields, Change Data Types etc. (c) 2007-2008 Hermetech International Ltd. |
||
|
|||||
|
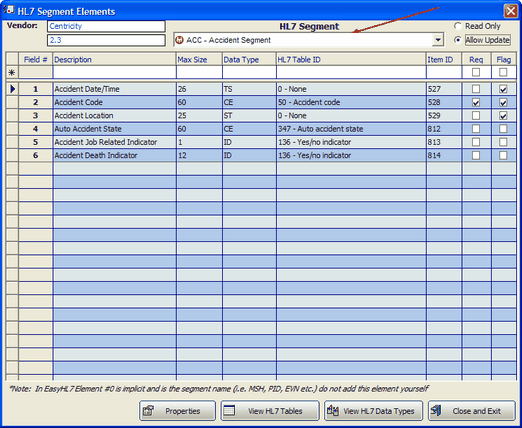
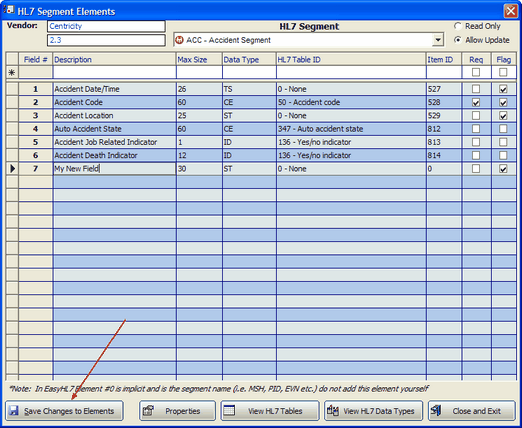
In the Segment Definitions window click the 'View Elements' button to view / edit individual segments and their field elements. See 'Editing Vendor Definitions' for how to create NEW HL7 Segments which can then be edited here. Select which HL7 segment you wish to edit in the 'Segments List' (shown below with the red arrow). To edit an existing field simply type new values into the columns (or check the checkbox, or select from a dropdown menu etc) and press the 'Enter' key on your keyboard when completed. A 'Save Changes to Elements' button will become visible, click this button to commit changes.
EasyHL7 Segment Elements
The Columns and what they mean
Adding a new field to a segment definition
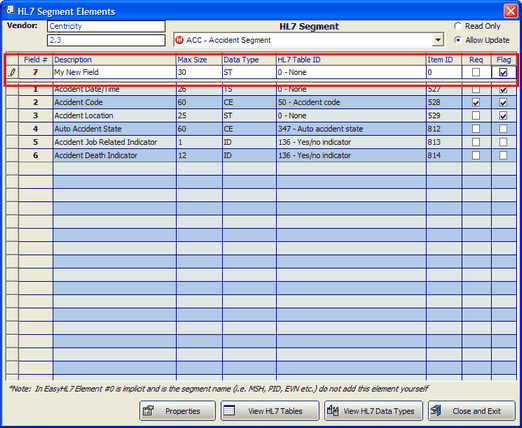
You add a field to an existing segment definition by typing in the values into the editable fields at the top of the fields list. You will notice that the 'Field #' is automatically created for you and you cannot edit it. Enter at least a Description, Max Size and select an HL7 Data Type (other fields are optional) and then press the 'Enter' key on your keyboard. To cancel an edit press the 'Esc' (Escape) key on your keyboard.
Adding a new field to a segment definition
After the field has been added but changes have not been saved yet
Inserting a field into a segment
Unfortunately, there is no way in the current versions of EasyHL7 to insert a field directly into the middle of a segment definition (example: to insert a field after field 3 and before field 4). To do this you have to delete all fields after the new field (example: delete fields 4-7), then add the new field (example: a new field #4), and then add all of the fields you deleted (example: add the fields back in will now be numbered 5-8).
Removing a field from a segment
To delete a field from a segment simply click in the leftmost column of the fields list and press the 'Del' (delete) key on the keyboard. The field numbers will be automatically recalculated to remain sequential (i.e. deleting field #4 would cause fields 5-7 to automatically be renumbered to 4-6).
Select the field and press the 'Del' key on the keyboard |